Bridge Pose (Setu Bandhasana) Benefits: Strengthen, Stretch, and Relax Your Body
What is a Bridge Pose?
Yoga has many benefits in today’s age and day as it calms the body, mind, and soul. To learn more about the bridge pose, please note that it’s a beginner yoga asana accessible to most people. It offers many benefits, especially for those sitting at their desks daily! It’s a great yoga pose for back pain!
Due to its versatility, this pose can be used for a workout or to strengthen specific muscles. You can easily modify this beginner pose for particular limitations or a more significant challenge.
Also called setu bandha sarvangasana, it is named after the bridge shape that the body makes in this backwards arching pose.
How To Do Bridge Pose: Step-by-Step Guide
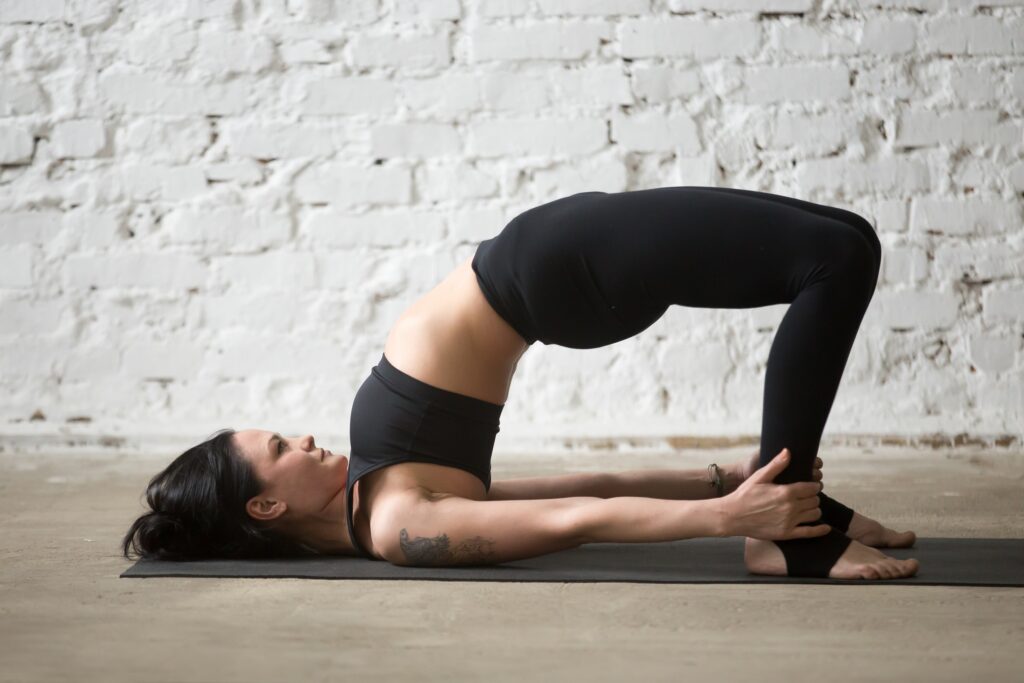
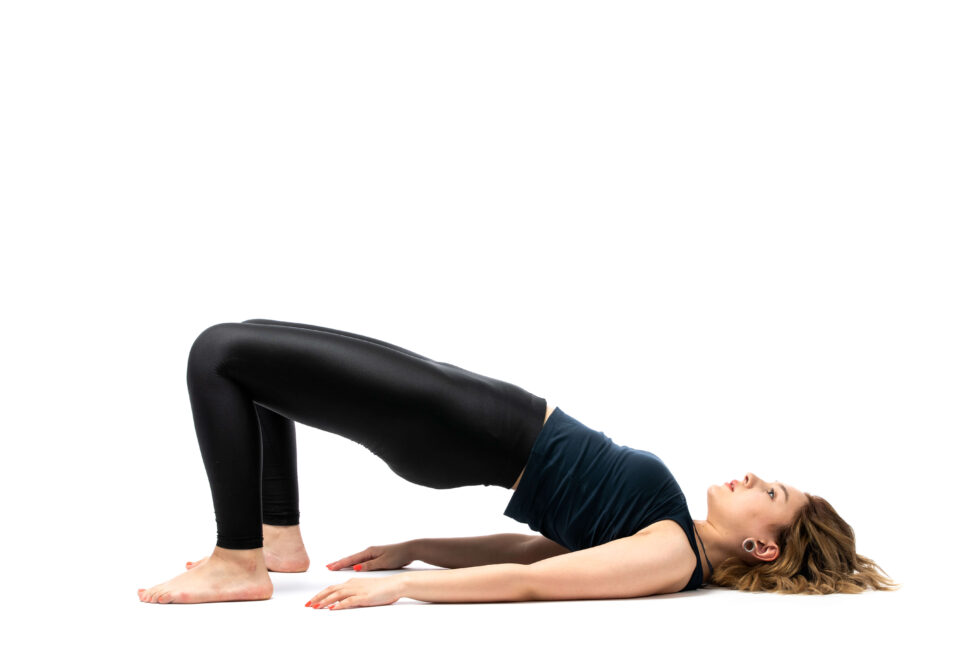
- Start by lying on your back, with your arms alongside your body and palms facing down.
- Bend your knees and heels close to your sitting bones
- Then press your feet and arms onto the floor, inhale, and lift your hips toward the ceiling
- After that, roll your shoulders under your body and interlace your fingers or keep your arms flat
- Lift your chest towards your chin
- Hold the pose, breathe deeply, and hold for 30 seconds to a minute
- Release, and gently lower your hips back down to the mat.
How Long Should You Do the Bridge Pose?
The Setu Bandhasana yoga pose is an inversion pose with many benefits. But the main question remains: How long should you do the bridge pose?
- One can stay here for 10–15 breaths or more to benefit from the posture.
- Another option is to lift and lower the hips for a few rounds. The exercise can be a beneficial warm-up.
- If this posture is part of Yin Yoga, you can hold it for 2–3 minutes, but with a block under your lower back to support you and make it more relaxing.
- To improve this posture, lift one leg off the floor, pointing straight up, stay there for 10-15 counts, and repeat it from the other side.
Top 5 Health Benefits of Bridge Pose (Setu Bandhasana) (सेतुबंधासन के फायदे)
1. Open and Stretch the Chest and Hips
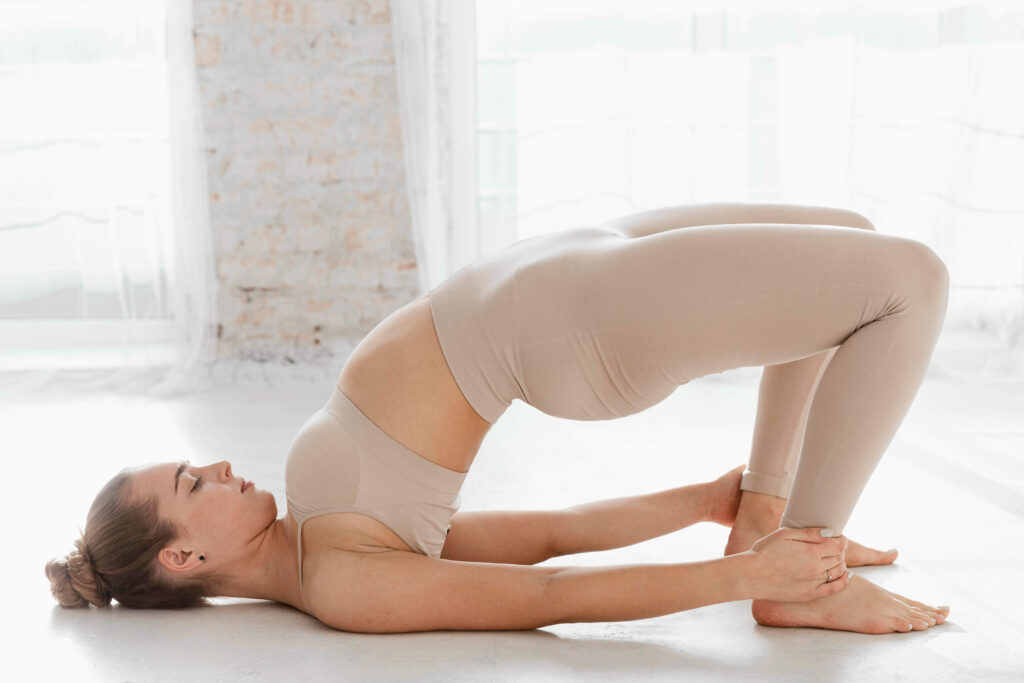
With bridge pose, one gets a fantastic stretch across the front of the body. One will feel the stretch across the neck, chest, abdomen, hip flexors, and quads! Opening the chest will help you breathe and relieve pressure on organs, which will help with digestion.
2. Strengthen the Back and Glutes
Setu Bandhasana also strengthens the back, hamstring, and glute muscles. By maintaining the lower back, one can relieve pain here. Your arms and shoulders also activate to hold you in this pose so that you can build strength in these areas, too!
3. Counteract the Effects of Sitting
If you sit most of the day, you will likely have tight hips and hunched shoulders, a posture that puts pressure on internal organs. A bridge pose can open and stretch the chest, roll the spine, and lengthen the hip flexors.
4. Mental Health Benefits
Inversion poses, like a headstand, provide some significant mental health benefits. Bridge pose is a gentle and accessible inversion that will help you feel more relaxed and calm.
5. Weight Management
This very inversion pose strengthens the abdominal muscles and hip flexors, supporting the back. Strong core muscles improve posture and balance! It also helps to regulate the endocrine system. Thus, it helps maintain a healthy metabolism and control weight.
Tips for Practising Bridge Pose
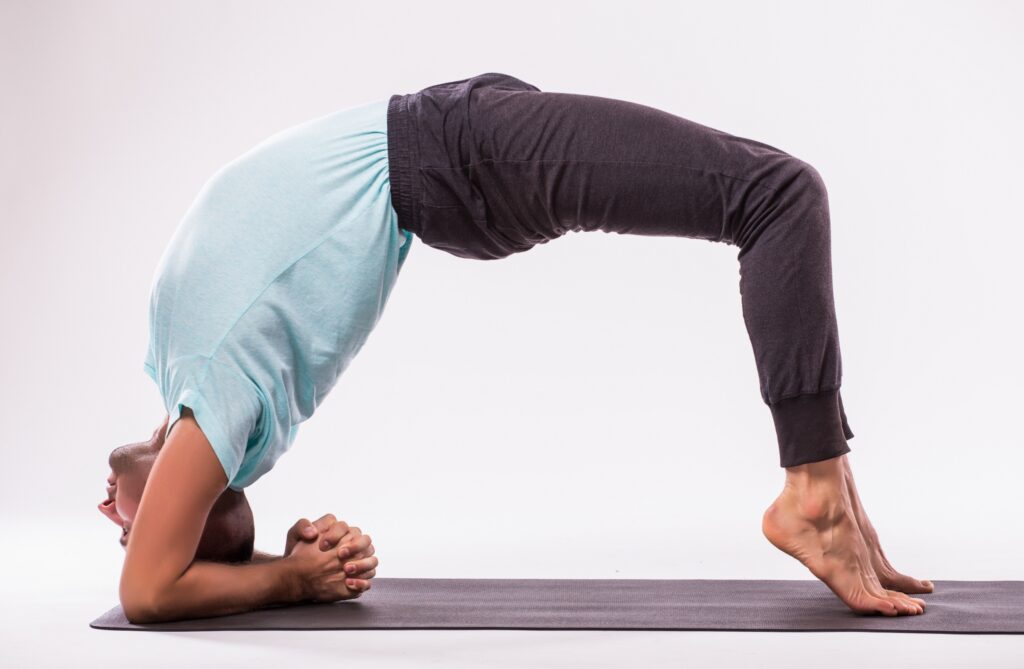
- Firstly, lie on your back with your knees bent, feet flat on the floor, and hip-width apart. Inhale and prepare
- Then, exhale and press into your feet to lift your hips towards the ceiling. The weight should be evenly distributed between your shoulders, arms, and feet.
- Interlace your fingers under your back for support. Press the outer edges of your feet firmly into the floor.
- Then, draw your shoulders away from your ears and press your chest forward.
- Thereafter, contract your gluteal muscles and squeeze your thighs inward.
- Hold the pose, breathing slowly and deeply.
- To release the pose, exhale and slowly lower your hips back down. At the end, rest in a child’s pose to relax your back!
Also Read – Top 7 Easy Yoga Poses (Asanas)
Pro’s and Con’s Of Bridge Pose
Pro’s of Bridge Pose
- Strengthens the back and core: The bridge pose helps to strengthen the muscles of the lower back, glutes, and core. It promotes overall body strength, especially in areas that are weak!
- Opens the chest and shoulders: As one lifts their hips up and roll their shoulders under, the chest opens up—helping to counteract the rounded shoulders and tightness many people experience because of sitting for long periods.
- Relieves Lower Back Pain: The bridge pose can help remove discomfort in the lower back by stretching the spine and hips. The pose leads to spinal flexibility and can also improve the health of the lumbar region!
- Boosts Circulation: The pose can improve blood circulation throughout the body, especially in the lower half, thus removing toxins and enhancing better oxygen flow.
- Improves Posture: Regular practice of Bridge Pose helps to strengthen the muscles that are responsible for good posture, especially the back and core. This very pose also encourages awareness of the body, helping to develop better posture habits.
Cons of Bridge Pose
- May increase neck and lower back issues: If the asana is not performed well, then it can lead to a lot of strain on the neck and lower back. Thus, those with existing neck, back, or spinal issues should take proper guidance.
- Not Good for Those With Knee Injuries: People with knee injuries may find bridge pose difficult and can increase discomfort. Modifications like using a block between the thighs to keep the knees in alignment can help reduce strain!
- Challenges for Those with Limited Flexibility: For those individuals with tight hips, hamstrings, or shoulders, lifting the hips into Bridge Pose may be difficult. However, with time and practice, flexibility will improve, and modifications can also be used.
- Discomforting for Pregnant Women: The pose can cause discomfort as the pregnancy progresses. The pressure on the abdomen and the backbend nature of the pose can feel uncomfortable for some. Thus, always consult a healthcare provider before practicing yoga during pregnancy!
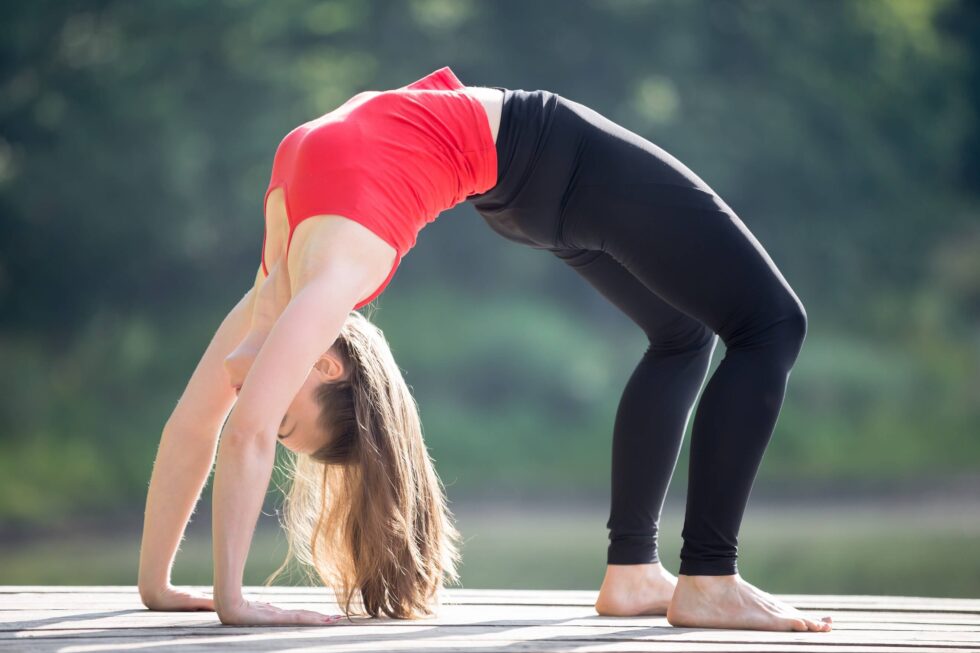
Advice for Beginners: Perform the Bridge Pose with Ease!
- Bridge poses can get complicated for beginners. Here is some advice for beginners:
- Keep the feet hip-width apart and the ankles and knees in line. Don’t let the backdrop down or curve.
- The chin should touch the collarbone. This will automatically direct your gaze upwards.
- Keep the thighs and glutes engaged throughout.
- One can also place a block between one’s thighs.
When Should You Perform the Bridge Pose?
- After an intense abs workout, this asana stretches the entire front part of the body, from the hips to the neck, making it a perfect counterpose for a fierce abs workout.
- Backbending sequence: If the very theme of the Vinyasa sequence is backbending, then this is a wonderful posture to add to the sequence, either dynamically or just as it holds.
- Yin/Restorative Yoga: This pose can be a great addition to Yin Yoga. Adding props under the lower back lets you relax the hip flexor muscles and make them flexible!
How to Modify Bridge Pose for a Safer, More Comfortable Backbend?
For those with tight hamstrings or lower back sensitivity, modifying Bridge Pose can provide a safer and more comfortable experience. A useful starting point is the Bent-Knee Bridge, where keeping the knees bent reduces strain on the lumbar spine. If you’re having trouble maintaining alignment, consider looping a yoga strap around both feet—this can help guide your knees inward and maintain balance.
Props can significantly alter the experience. Using yoga blocks under the hips, positioned in line with the waist, minimises the effort needed to lift into the pose. This supported version allows you to enjoy the benefits of a backbend without placing too much pressure on your lower back.
Another accessible option is the Half Bridge, where only the hips and lower back lift off the ground, leaving the shoulder blades grounded. This version offers a more moderate arch, making it ideal for those easing into deeper backbends.
If you want to reduce intensity further, draw your feet closer to your hips. This shortens the leverage, making the lift smoother and less demanding on the hamstrings. You can also place a bolster or chair under your feet to elevate them—this helps the hips rise with more ease and less tension.
For extra support and grounding, interlace your fingers beneath your back or press your palms gently into the mat. Whatever variation you choose, remember to tune in to your body’s signals and avoid pushing beyond your limits. Yoga is about building awareness just as much as building strength.
Also Read: Top 7 Yoga Asanas for Weight Loss
Use of Yoga Accessories in Setu Bandha Sarvangasana
- It is essential to lie comfortably on the ground. The yoga mat provides comfort and grip, like a cushion for the body.
- Fold the yoga blankets to support your shoulders. If you are not flexible, place the folded blankets under your shoulders in the back.
- Yoga pillows can provide proper neck alignment and additional support to prevent strain while performing yoga poses.
- You can use the yoga blocks for various exercises. For example, you can support your arms by placing the yoga block between your legs or under your hands.
- Use a yoga strap to align your arms and shoulders. Wrapping them around the upper arms prevents your arms from going outward.
Transform Your Health with the Power of Yoga – Join Us on the Healing Path
Bridge pose, or Setu Bandhasana, is an excellent backbend in yoga with numerous physical, mental, and emotional benefits. Whether you’re a beginner or an experienced yogi, this pose helps to enhance flexibility, strength, and relaxation!
The pose has many benefits; one can practise it to reap them. However, if you’re a beginner, you should follow several precautions and tips.
If you’re passionate about yoga or currently facing a health condition—whether it’s stress, high blood pressure, chronic pain, or hormonal imbalance—know that you’re not alone and healing is possible. At our yoga school, we’ve guided thousands of students through personalised practices that have helped reverse everything from minor discomforts to long-standing chronic illnesses.
Our carefully crafted Yoga Courses and Healing Retreats combine ancient yogic wisdom with a therapeutic approach, designed specifically to suit your body, your needs, and your lifestyle.
Whether you’re seeking balance, vitality, or complete rejuvenation—this could be your turning point.
👉 Explore Our Yoga Courses | Book a Healing Retreat
Your journey to wellness begins here. Let yoga be your medicine.
Some Frequently Asked Questions:
1. What is the purpose of the bridge pose?
The bridge pose has many benefits. It strengthens the back, opens the chest, and improves spinal flexibility. It also promotes circulation for overall physical and mental well-being.
2. Who should not do the bridge pose?
Avoid a bridge pose if you have neck, shoulder, or back injuries and severe back pain.
3. Is bridge pose suitable for beginners?
Yes! It is a beginner-friendly pose, so proper alignment and gradual practice are necessary to avoid strain!
4. What are the common mistakes to avoid in Bridge Pose?
Some common mistakes are knees splaying outwards, over-arching the lower back, and not engaging the core or glutes.
Updated on: 05-11-2025

MEDITATION, INSPIRATIONAL AND SPIRITUAL GUIDE
Yogi Gangesha Chaitanya is a master of Yoga Philosophy, Meditation, Pranayama, and Spiritual Guidance, trained under Swami Rama and renowned institutions like the Himalayan Tradition and Sri Aurobindo Ashram. With expertise in Kundalini Yoga and meditation, he mentors students in 200-hour and 300-hour Yoga Teacher Training programs, guiding them toward inner awareness, spiritual growth, and a deeper understanding of yoga.
View Instagram Profile


